The EmailOctopus add-on needs to be installed and activated to see the features mentioned in this documentation.
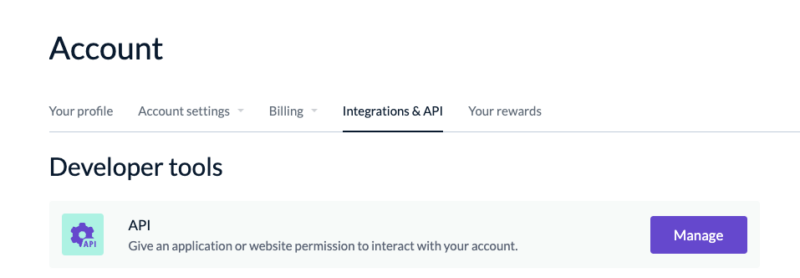
To create your EmailOctopus API key, log in to your EmailOctopus Account then click on your profile to access Integrations & API settings, and click Manage.
Another page will open. Here, you click Add a key.
 Enter the optional Key name and click Create to access your API key. Your API key will display along with options to Copy or Download the key. Make sure you save it and secure this key as it won’t show again in your account.

Copy your API Key and go to Ninja Forms > Settings > EmailOctopus and input your API key.

Scroll to the bottom of the page and click Save Settings.
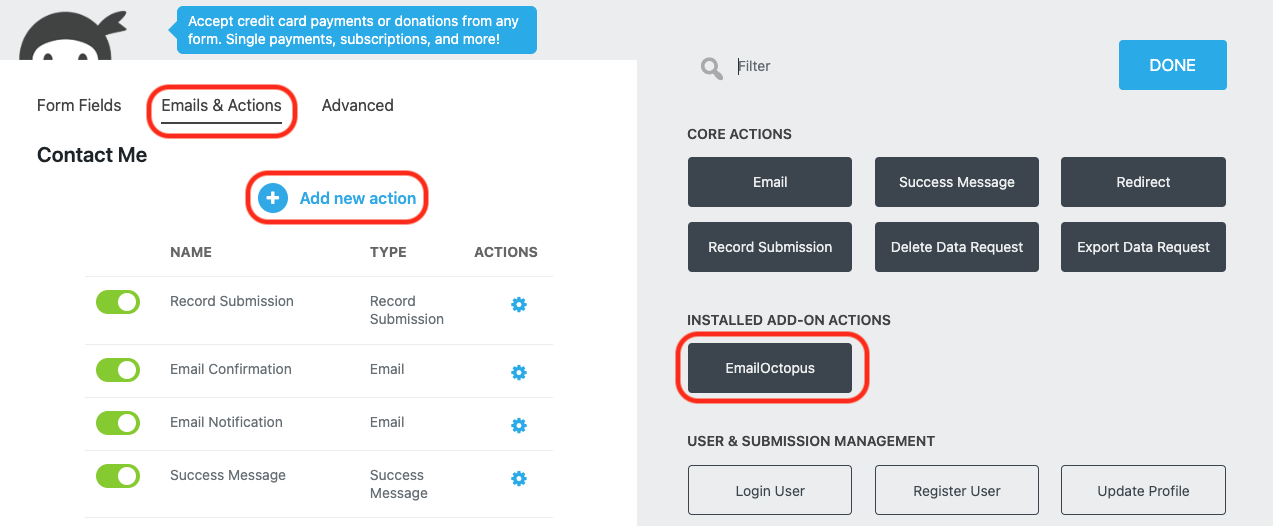
To add the action to any form, from the Emails & Actions tab click Add New Action and then the EmailOctopus action from inside the Actions Window that opens.
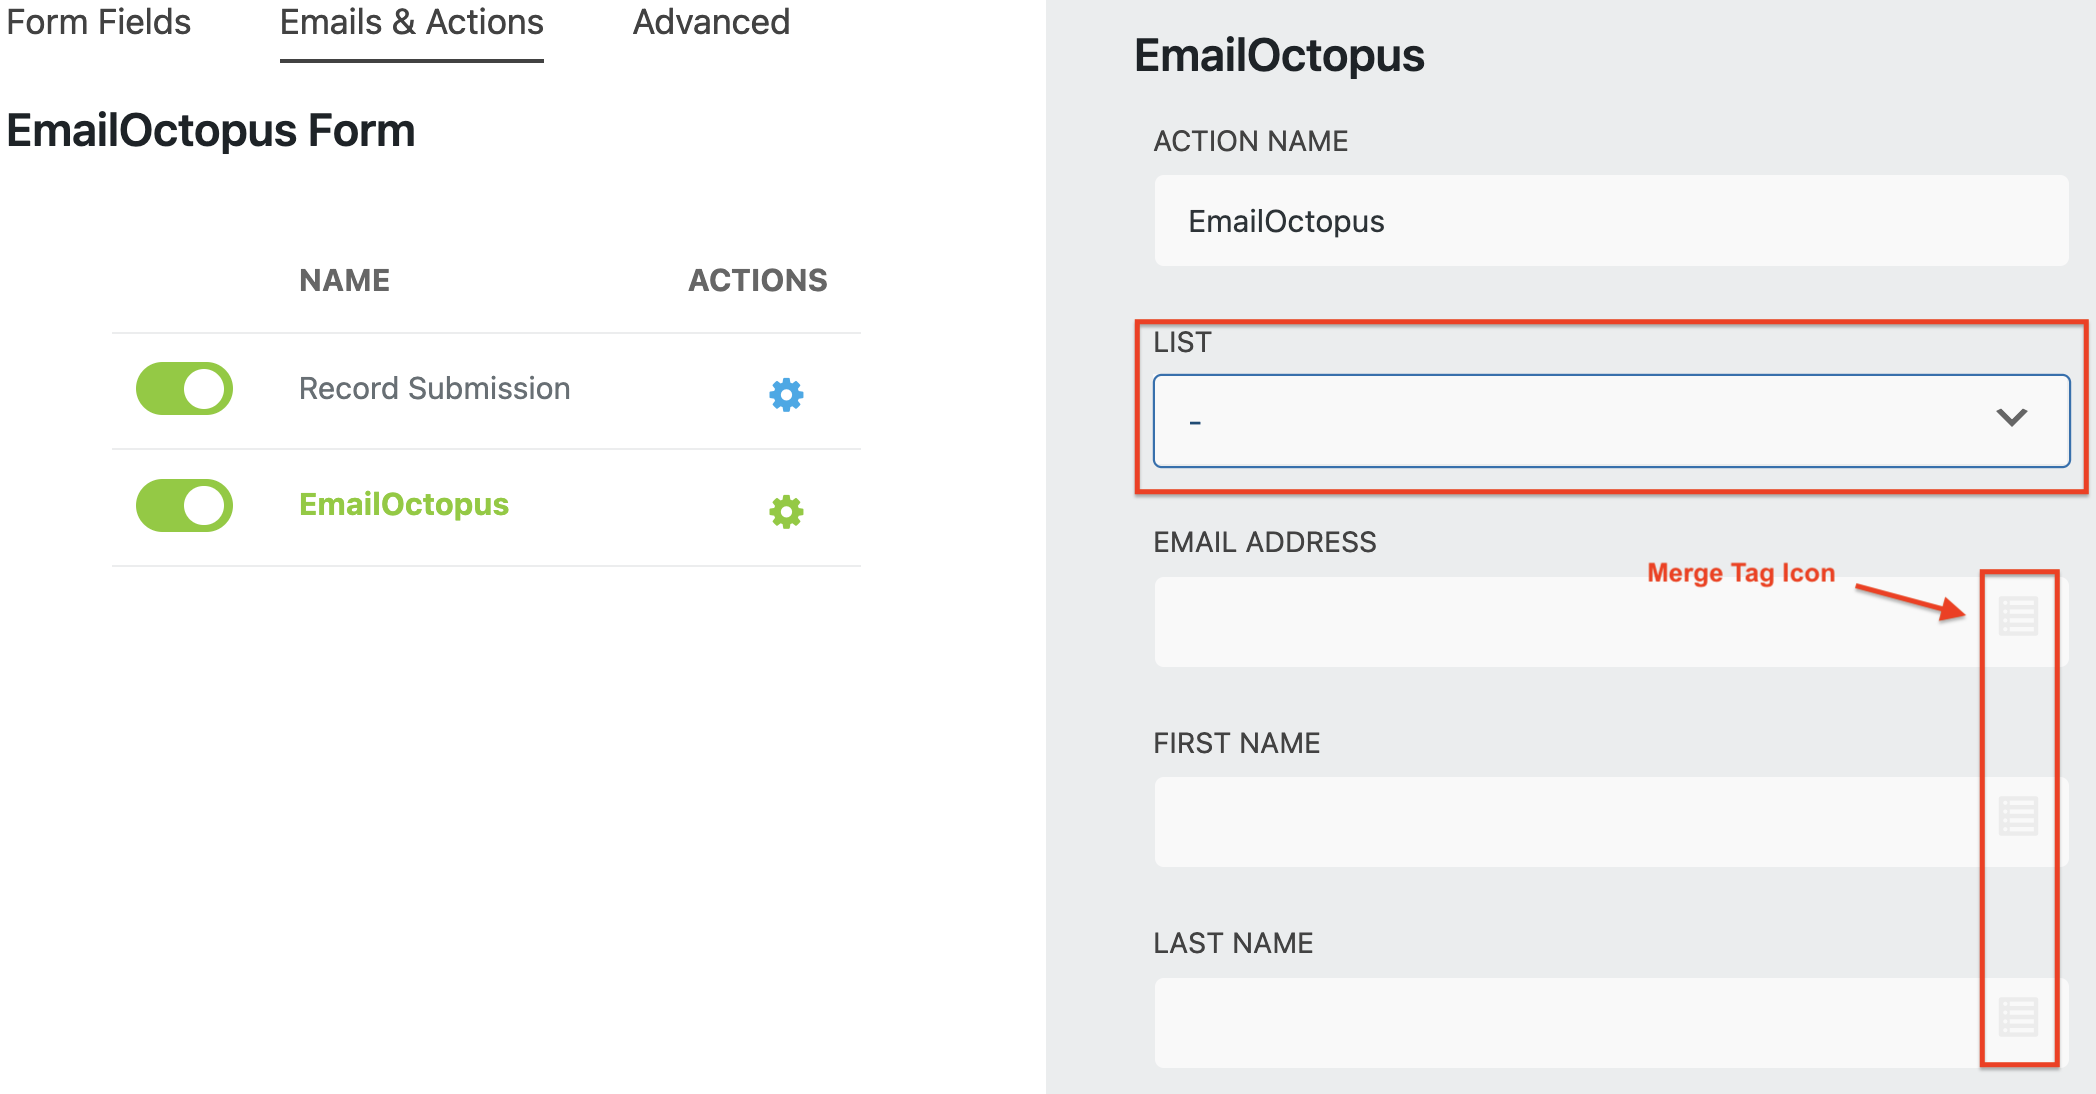
Select the appropriate list from EmailOctopus then add the Merge Tags to map the Ninja Forms fields to the appropriate EmailOctopus fields.
For information on how to set up your lists in EmailOctopus, please reference their support documentation.
[su_divider top=”no” divider_color=”#ccc” size=”8″ margin=”50″]
[su_box title=”EmailOctopus Tutorials & Blog Articles” style=”noise” box_color=”#eceff7″ title_color=”#EC494D” radius=”8″]
Proven Ways to Get More Newsletter Signups
Creating a List in EmailOctopus
[/su_box]